
A supplier cannot build a stable production order from a product photo, an order quantity, and the message "same as sample." That information may be enough to start a conversation. It is not enough to tell purchasing, production, quality control, and an outside inspector which details the buyer has approved.
The usual problem is not a total lack of information. The buyer has dimensions in one drawing, colors in chat, packaging in an artwork file, and a material change buried in the sample comments. The supplier has its own model number and may still be using an earlier file. Everyone has information, but nobody has one controlled answer.
Use this checklist to build that answer. The finished specification sheet should support supplier quotation, sample development, purchase order confirmation, production handoff, and inspection. It should identify the product, state measurable requirements, list controlled attachments, record approved exceptions, and show which revision is current.
A specification sheet can provide a clearer production reference and may reduce avoidable misunderstandings. It cannot make every unit identical, replace an approved sample, or replace inspection. Product testing, engineering validation, certification, regulatory review, and legal advice may still be required depending on the product and market.
1. Define the Purpose of the Specification Sheet
Write the document purpose at the top before filling in technical fields. A sheet marked For Quotation can contain open options and target values. A sheet marked Approved for Production should contain confirmed requirements, controlled references, and a short list of clearly owned exceptions. Mixing those stages makes a supplier guess what is fixed.
Record the product stage, intended recipient, and decisions the document supports. It may be used for supplier comparison, sample development, a pre-production sample, production release, inspection, reorder, supplier transfer, or corrective action. State whether inspection requirements are included or issued as a separate controlled attachment.
2. Add Document Identification and Version Control
Give the sheet a document title, product name, buyer SKU, supplier model, document number, revision, issue date, and status. Record who prepared, reviewed, and approved it. Add the related quotation, PO, drawing, and sample references so another person can trace where each requirement came from.
Do not keep several files called Final. Use statuses such as Draft, For Quotation, For Sample, For Review, Approved for Production, and Superseded. A revision history should show the date, section changed, short change description, author, and approver. Preserve old versions, but keep them out of the active production folder.
| Control field | What to record | Example format |
|---|---|---|
| Document identity | Document number and product name | KS-SPEC-021 Product Name |
| Revision | Revision code, issue date, and status | Rev 3, Approved for Production |
| Related records | PO, quotation, sample, and drawing references | Exact number and revision |
| Approval | Prepared, reviewed, approved, and supplier-confirmed by | Name, role, and date |
3. Identify the Product Clearly
Record the buyer SKU and supplier model together. Add the product name, family, variant, size, color, capacity, configuration, brand, intended market, and intended use. A photo and drawing can support identification, but the written fields decide which version the document covers.
Create a separate row or sheet when color, size, voltage, plug, gas type, material, language, or packaging changes. Do not place several market configurations in one line with notes scattered across columns. Variant quantities and filenames should use the same SKU structure used by the PO and carton labels.
4. Include Clear Product Reference Images
Use front, rear, side, top, bottom, interior, component, accessory, label, logo, and packaging views where they help. Give every image a view name and reference number. Add arrows or callouts for the feature being discussed, and mark a rendering or sketch as not to scale when appropriate.
Images explain shape and location; they do not define a dimension, material, tolerance, color, technical setting, or test result. Avoid using an unexplained marketplace photo as a production standard. If an image conflicts with the written specification or drawing, resolve the conflict and issue a new revision before approval.
5. Define Overall Dimensions
List the dimensions that describe fit and use: length, width, height, diameter, depth, thickness, opening size, internal space, folded size, extended size, installation dimensions, and required clearance where applicable. Show the measurement location on a drawing when two people could measure the feature differently.
Use one controlling unit, usually millimeters for international manufacturing files. If metric and imperial values both appear, state which one controls and calculate the second carefully. Keep product dimensions separate from retail-box and master-carton dimensions; mixing them is a surprisingly common source of wrong quotes and failed inspections.
6. Set Practical Dimensional Tolerances
For each measured feature, record the nominal value, upper and lower tolerance, measurement location, tool, and whether the characteristic affects safety, fit, function, appearance, or packaging. A general format such as 500 mm plus or minus 2 mm shows the structure, but it is not a recommendation for a particular product.
Tolerances should reflect intended use, material, manufacturing process, assembly relationship, and risk. Tighter is not automatically better. An unnecessarily narrow range can raise cost, extend lead time, exceed the process capability, and create inspection arguments without improving the product. Ask a qualified technical person to confirm high-risk tolerances.
7. Specify Product Weight and Capacity
Separate product net weight from packed unit weight, shipping net weight, and gross carton weight. For containers or load-bearing products, distinguish rated capacity, usable capacity, maximum capacity, fill level, and maximum working load. State quantity per set when the product is sold as several pieces.
Replace approximately correct with an allowed range and a defined test condition. Record the weighing method, fill medium, load distribution, temperature, stabilization time, or other condition when it affects the result. Capacity and load claims may need technical validation or applicable testing before they appear on a product or package.
8. Define Materials by Component
Create a material row for each main component. Record the material, grade or composition where known, thickness, density or hardness where relevant, surface treatment, recycled content, food-contact status when applicable, and any approved source or material reference. Do not invent a grade because it sounds more precise.
When a supplier proposes a substitute, record the original and proposed material, reason, appearance and performance effects, cost and lead-time effects, possible compliance impact, and whether a new sample or test is required. The buyer should approve the change in writing before the substitute enters production.
9. Record Material Thickness and Construction
A material name by itself often leaves the biggest cost and performance variables open. Add sheet or wall thickness, fabric weight, foam or glass thickness, wire diameter, tube diameter and wall thickness, coating thickness, layer construction, lamination, reinforcement, and joint method where they apply.
Describe welding, adhesive, stitching, fasteners, or other assembly methods only to the level needed for purchase, production, and inspection. If the construction affects strength or safety, use an approved drawing and qualified technical review. The specification should point to that controlled record rather than paraphrase it badly.
10. Specify Color With a Controlled Reference
Black, white, blue, and gold cover too many real colors. Record a standard code such as Pantone or RAL where suitable, the supplier color reference, physical swatch, approved sample, gloss level, texture, and the exact area where the color applies. Name the controlling reference when several are shown.
Screens, phone cameras, lighting, and surface finish change how a color appears. Use photographs to record context, not to approve an important color on their own. For plastics, fabrics, coatings, or natural materials, agree how variation will be judged and whether a production sample is needed.
11. Define Surface Finish and Texture
Specify the finish for each visible component: matte, gloss, satin, brushed, polished, painted, plated, anodized, textured, embossed, or another defined treatment. Record the application area, color, gloss, texture, grain direction, visible pattern, protective film, and physical reference.
Words such as smooth or premium finish are too broad unless the team shares a reference. Use a measurable roughness or gloss range when the product and process justify it; otherwise use an approved sample and defect photographs. State what visible variation is acceptable on different parts or production lots.
12. Define Product Structure and Components
Build a component table with component number, name, material, quantity per product, size, color, function, assembly method, replaceable status, and approved source where required. Include the main body and the easy-to-miss parts: fasteners, feet, seals, hinges, switches, cables, connectors, controllers, and decorative pieces.
The component list should agree with drawings, sample records, quotation, and inspection plan. If the supplier uses an internal bill of materials, ask it to map controlled buyer characteristics to the relevant parts. Do not add a link to a future BOM guide until that resource actually exists.
| Component | Requirement | Assembly or location | Control reference |
|---|---|---|---|
| Main body | Material, thickness, finish, color | Primary structure | Drawing and material sample |
| Functional part | Model, rating, quantity, compatibility | Defined position | Component data and sample |
| Fastener or seal | Type, material, size, quantity | Joint or sealing point | Exploded view |
| Decorative part | Material, color, finish, alignment | Visible surface | Approved sample and photo |
13. Record the Technical Configuration
Depending on the product, record voltage, frequency, power, current, plug, cable type and length, battery, gas type and pressure, motor, temperature range, speed, controller, firmware, connector, water connection, drain connection, and installation requirements. Mark non-applicable fields rather than leaving uncertain blanks.
Keep market-specific configurations separate. Different voltage, frequency, plug, gas type, label, or manual language usually needs a distinct SKU or controlled variant. Confirm that the product label, packaging, PO, and inspection file use the same market configuration. Qualified review may be required for electrical, gas, pressure, or software-controlled products.
14. Write Functional Requirements as Tests
Describe what the product must do, the operating sequence, controls, adjustment range, moving parts, assembly, opening and closing, loading, heating, cooling, timing, cleaning, maintenance, compatibility, and any safety interlocks that apply. Then turn each important statement into an observable check.
A useful functional requirement includes the test condition, expected result, acceptable range, duration, and number of cycles where relevant. Works well, normal function, and good performance give the supplier and inspector nothing to judge. If the method is unknown, mark it for technical confirmation instead of inventing one.
15. Define Performance Requirements Carefully
Performance fields may cover output, heating or cooling time, temperature stability, speed, noise, energy use, load behavior, water resistance, drop resistance, cycle life, pressure, accuracy, or durability. Select only the measures tied to intended use and customer acceptance.
Record the target, test method, environment, equipment, duration, and acceptance range. There is no universal performance test for every product. Safety, certification, or regulated claims should be reviewed by qualified technical or compliance professionals and tested by an appropriate laboratory where necessary.
16. Define Appearance and Workmanship Standards
List the visible defects that matter for the product: scratches, dents, cracks, chips, burrs, sharp edges, stains, rust, glue or weld marks, uneven coating, gaps, misalignment, loose parts, warping, printing faults, stitching defects, and surface contamination. Good workmanship is not an inspection criterion.
For important defects, record the allowed location, size, quantity, viewing distance, lighting, defect class, and reference photograph where practical. Do not invent thresholds without a product basis. A hidden mark on a non-contact surface may be treated differently from the same mark beside a logo or sealing surface.
17. Mark the Characteristics That Need Priority
Classify selected fields as critical to safety, function, fit, appearance, compliance, customer assembly, or packaging. A simpler priority scheme such as Critical, Major, Standard, and Reference Only can work when every user understands the definitions and action tied to each level.
Do not mark everything critical. If every line receives the highest priority, the label stops helping production and inspection. Reserve it for requirements that change the decision to release, stop, rework, or escalate, and have qualified reviewers confirm any safety or compliance classification.
18. List Accessories and Included Items
List standard and optional accessories, installation hardware, cables, plugs, adapters, tools, manuals, cards, consumables, spares, batteries, mounting parts, and protective covers. For each item, record model, quantity per unit, material, color, label, pack location, and whether it is included or separately ordered.
A correct main product can still be unusable when an adapter or mounting part is missing. Reconcile this section with the Order Requirements Checklist before the supplier prepares the final quotation and packing plan.
19. Define Branding Requirements
Record the brand name, logo filename and revision, size, color, application method, position, orientation, and minimum clear space. Add a placement drawing with measurements from stable product edges. If engraving, embossing, debossing, laser marking, printing, or a nameplate is specified, identify the applicable part and finish.
Add our logo is not a complete instruction. Require an artwork proof or marked pre-production sample when placement and appearance matter. Approval should name the exact file and revision. A supplier mockup is useful evidence, but it should not become an uncontrolled replacement for the buyer artwork.
20. Define Labels and Markings
List product, model, rating, warning, safety, importer, barcode, QR code, serial, batch, date-code, origin, and carton labels that apply. For each one, record content, language, material, dimensions, placement, print quality, variable-data rule, and artwork revision.
Certification and regulatory marks cannot be printed merely because a buyer requests them. Confirm the right to use each mark against genuine certification, testing, and applicable rules. The specification can record an approved requirement; it does not establish legal eligibility or guarantee compliance.
21. Define the Packaging System
Document unit protection, bag or film, foam or molded insert, paper insert, retail box, inner carton, master carton, pallet, moisture protection, corner protection, accessory packing, quantity per carton, carton size and weight, shipping marks, barcode position, and mixed-SKU policy.
Packaging usually needs its own drawings and artwork controls. Use the Private Label & Packaging Checklist to review the packing diagram, product orientation, accessory location, sealing method, artwork revision, and carton-mark version.
22. Define Instruction Manual Requirements
Record the manual title, covered models, language, installation and operating instructions, warnings, cleaning, maintenance, troubleshooting, technical data, parts list, contact details, artwork revision, print size, paper, binding, and packing location. Treat the manual as a controlled product component.
When several models share one manual, verify that every instruction, image, rating, and accessory applies to each model. Market versions may require different languages or content. Technical, safety, and regulated statements should be reviewed by people qualified for the product and destination market.
23. Index Drawings and Technical Files
Add an attachment index for general arrangement drawings, dimension drawings, exploded views, component drawings, electrical or wiring diagrams, packaging dielines, label and logo artwork, manual, color reference, and inspection checklist. Record filename, document number, revision, date, owner, and approval status.
Sending a folder of attachments is not document control. The index tells the supplier which files belong to the approved specification and which have been replaced. Check that file links open for the supplier and inspector, and keep editable working files separate from approved release files.
24. Reference the Approved Sample Precisely
Record the sample type, revision, date, approval date, buyer and supplier sample IDs, approved exceptions, retained sample locations, and reference photographs. State whether it controls appearance, function, packaging, or only selected characteristics. A sample can have accepted defects that should not be repeated.
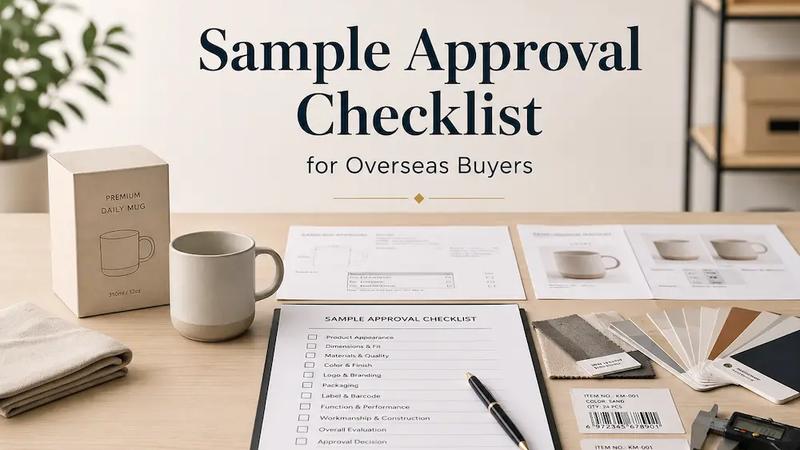
Use the Sample Approval Checklist to record what was checked and which differences remain. "Same as approved sample" still leaves too much open; the sample and written specification should support each other, not compete for priority.
25. Record Approved Deviations and Exceptions
Maintain an exception table with the original requirement, approved deviation, reason, affected SKU and quantity, appearance and function effects, price and delivery effects, inspection treatment, decision date, and approver. Examples include a temporary label, alternate component, revised color, or changed carton size.
An approved exception should be narrow and traceable. It should not quietly become the normal requirement on the next order. If the buyer wants the change permanently, revise the specification and related files. Remove rejected proposals so production cannot mistake them for accepted options.
| Original requirement | Approved deviation and scope | Effect and inspection treatment | Approval |
|---|---|---|---|
| Controlled requirement and revision | Exact alternative, SKU, and quantity | Function, appearance, price, timing, and inspection | Buyer approver and date |
| No deviation approved | Open proposal only | Production hold or allowed preliminary work | Owner and decision deadline |
26. Convert Requirements Into Inspection Criteria
For each checkable requirement, record the inspection item, acceptance requirement, method, measurement tool, agreed sample size, allowed range, defect classification, reference file, and sample reference. Cover quantity, dimensions, material evidence, weight, appearance, function, accessories, labels, packaging, and carton marks as applicable.
Prepare the actual inspection handoff with the China Pre-Shipment Inspection Checklist . The inspector needs the final controlled specification, not a sales brochure or an old sample comment.
Use the Quality Inspection Preparation Guide to confirm inspection timing, available references, test access, sample status, and the decision process for findings.
27. Define Test Methods Where Necessary
A test entry should state the condition, equipment, duration, repetitions, expected result, and acceptable range. Depending on the product, checks may include visual review, dimensions, weight, assembly, fit, load, leak, temperature, power, barcode scan, label adhesion, carton measurement, or a packaging test.
Choose methods based on the product and the risk. Do not copy one test plan across unrelated products. If a safety, regulatory, or performance claim requires a recognized method, ask a qualified professional or laboratory to define or confirm it before the specification is approved.
28. Separate Requirements From Reference Information
Label information by status. A Mandatory Requirement applies unless the buyer approves a change. An Approved Range allows defined variation. Reference Only helps the reader understand context but is not an acceptance limit. A Target remains under review until the buyer decides whether it is mandatory.
This distinction matters when drawings, photos, samples, and written values do not match perfectly. State the controlling source and conflict rule. Without priority, production may choose the easiest interpretation while inspection chooses the strictest, and both can point to the same document.
29. Review the Specification With the Supplier
Ask the supplier to review product identity, materials, dimensions, tolerances, color, configuration, components, accessories, branding, packaging, test methods, inspection criteria, attachments, exceptions, cost, and lead time. Give it a response table rather than asking for a general confirmation.
Useful responses are Can Comply, Cannot Comply, Needs Clarification, Proposed Alternative, New Sample Required, Added Cost, and Added Lead Time. OK, noted, and no problem do not show what was reviewed. Store the dated response with the exact specification revision it covers.
30. Confirm Production Feasibility
Ask the supplier to route the approved draft to the people who will execute it: engineering, purchasing, production, quality, packaging, printing, and warehouse staff as applicable. A salesperson may understand the buyer request but still miss a process limit or material availability issue inside the factory.
For a custom or technical product, review tooling, material supply, process capability, tolerance feasibility, testing capacity, packaging method, lead time, and cost effect. Suppliers organize teams differently, so record who actually reviewed the relevant sections rather than assuming every factory follows the same approval process.
31. Link the Specification to the Purchase Order
The PO should name the specification title, document number, revision, and date. It should also reference the approved sample, drawings, packaging files, artwork, and exception list that apply to the order. The specification should carry the related PO number once issued.
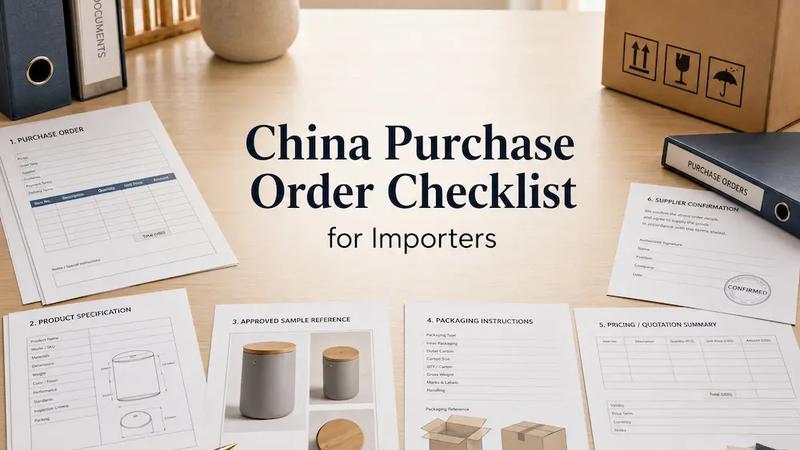
Use the China Purchase Order Checklist for Importers to reconcile products, quantities, prices, payment, delivery, attachments, and supplier confirmation. Never release a PO that points to an unapproved, superseded, or missing specification.
32. Release the Specification for Production
Before approval, check the identity, major dimensions, materials, colors, configuration, accessories, branding, packaging, drawings, sample status, inspection criteria, supplier response, and open issues. Record the production-release decision in writing with the approver, date, revision, and permitted scope.
An incomplete item does not always stop every activity. State whether the supplier may quote, source material, make tooling, produce a pilot, or begin product production, and whether packaging printing or mass production remains on hold. A deposit or sample approval should not be interpreted as a broader release.
33. Control Specification Revisions
For every change, record the revision, date, changed section, old and new requirement, reason, cost and lead-time effects, sample effect, inspection effect, supplier confirmation, and buyer approval. Issue the full revised document rather than sending a replacement instruction that lives only in chat.
If production has started, use the China Production Follow-Up Checklist to record affected materials, finished quantity, rework, new evidence, and inspection updates. Mark the previous specification as superseded and tell every affected team which revision now controls.
34. Store the Complete Specification File Pack
Keep the approved sheet, revision history, drawings, sample record, reference photos, materials and colors, artwork, labels, packaging, manual, accessories, exceptions, supplier confirmation, and inspection checklist under one product and order reference. The current release should be easy to find without deleting its history.
Use a filename such as KS-SPEC-2026-021_Product-Name_Rev3_APPROVED.pdf and apply the same document number to its attachment index. The exact naming convention matters less than consistency. Restrict sensitive design files to people who need them and do not place real customer or proprietary data in public templates.
35. Fix Common Product Specification Mistakes
The most common mistakes are predictable: photos replace dimensions, files have no revision, buyer and supplier codes are mixed, material or thickness is vague, units change, product and carton sizes are confused, tolerances are unrealistic, colors use names only, and accessories disappear from the final pack.
The later failures are more expensive. A certification mark is added without authority, packaging stays in chat, the file says only same as sample, exceptions are not recorded, inspectors receive no acceptance criteria, the supplier replies OK, or production uses an old revision. Fix each problem in the controlled specification and notify affected teams.
36. Run the Final Product Specification Review
Use the structured checklist below before the supplier quotes a final price, develops the approved sample, or starts production. Mark each item Complete, Not Applicable with a reason, or Open with an owner and decision date. Do not hide unresolved product requirements inside a general approval.
The final output is a controlled specification package that the buyer, supplier, and inspector can use without reconstructing months of messages. It will still need judgment, suitable testing, and inspection. What it removes is the avoidable question of which product version and requirement everyone was supposed to follow.